
Table of Contents
You have to explain something to a prospect or client that would be much easier to review in person. But that’s not an option all the time…or is it? It is with a screen recorder!
With BombBomb’s Screen Recorder, you can easily record yourself and your screen at the same time to discuss complex details face-to-face—even when you can’t meet physically. It could be anything from demonstrating how a product works to walking a client through a contract.
Ways to Record Your Screen with Audio
BombBomb offers several versatile methods for recording both your screen and audio simultaneously, ensuring that you have the tools to meet various recording needs:
- Desktop Application: The BombBomb desktop application allows you to record your computer screen with audio. This app covers all bases, whether you need to capture your entire screen, a specific application window, or a designated area. It’s perfect for creating detailed visual presentations with clear audio commentary.
- Chrome Extension: For those who prefer working directly in the browser, the BombBomb Chrome extension is ideal. It lets you record your entire screen, a specific tab, or a webcam while including audio. This feature is especially useful for capturing live actions on the web and adding explanatory audio on the go.
- Gmail Integration: BombBomb’s Gmail integration enhances your email communications. Use the Chrome extension to record your screen and audio directly within Gmail. This functionality is excellent for adding a personal touch to emails or explaining complex subjects directly from your inbox.
- Outlook Integration: For those who prefer working directly in Outlook, the BombBomb integration is ideal. This integration lets you effortlessly create and embed videos directly within your Outlook emails, whether you’re recording a quick message or capturing your screen with audio. It’s an excellent tool for delivering clear and concise visual explanations, making your emails more engaging without ever leaving your inbox.
- Mobile Application: Available for both iOS and Android, the BombBomb mobile app lets you record videos with audio using your device’s camera. While it doesn’t support screen recording, it’s excellent for on-the-move video messages or quick updates.
However, the simplest way to use the screen recorder is with our BombBomb Google Chrome Extension. Watch the video below for a quick overview of the BombBomb Screen Recorder.
Also, keep reading to learn how to use the BombBomb Screen Recorder, see ways you can use the tool, and discover best practices for success.
How to Screen Record on Chrome with BombBomb
Here’s how it works:
1. Get Google Chrome
You must have Google Chrome installed on your computer to use the extension. If you don’t have it yet, you can download the browser here.
2. Download the BombBomb Google Chrome Extension
Head to the Chrome Web Store, search “BombBomb,” and press the “Add to Chrome” button to get the extension directly on your browser.
After that, a small BombBomb icon will appear next to your web address bar. You can also click here to get the extension instantly.
3. Log In to Your BombBomb Account
Click on the BombBomb Google Chrome icon, and when prompted, enter your BombBomb email and password to log in to the BombBomb Google Chrome Extension.
4. Launch the Screen Recorder
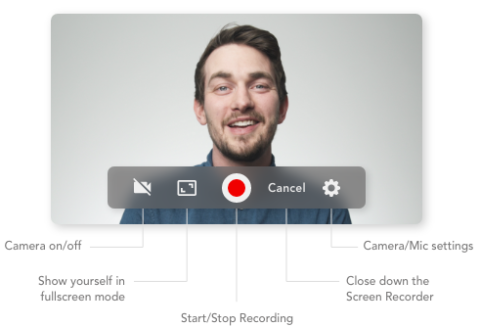
Once you’re logged in, click on the icon again. You’ll already be on the “Record” tab on the following screen.
You’ll have the option to choose your camera. Next, select the “Screen Recorder” option to record yourself and your screen simultaneously.
5. Allow Screen Recording:
Enable screen recording permissions on your device. Go to your system settings and allow BombBomb to access your screen and camera. This step is crucial for recording both your screen and yourself.
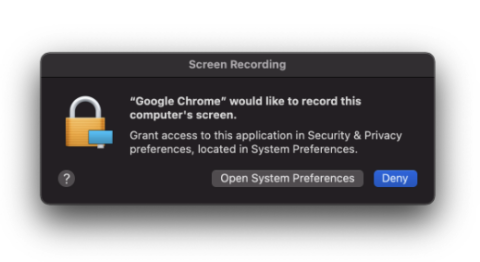
6. Record Your Video:
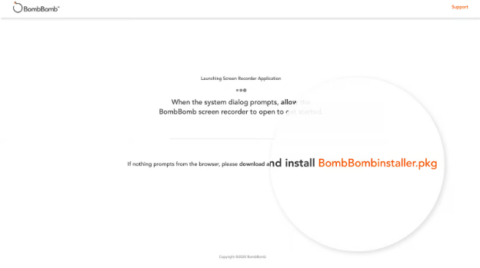
Then, click “Launch Recorder.” A new tab will open, asking permission to launch the Screen Recorded on your computer. Click “Open BombBomb Screen Recorder” to launch the screen recording app.
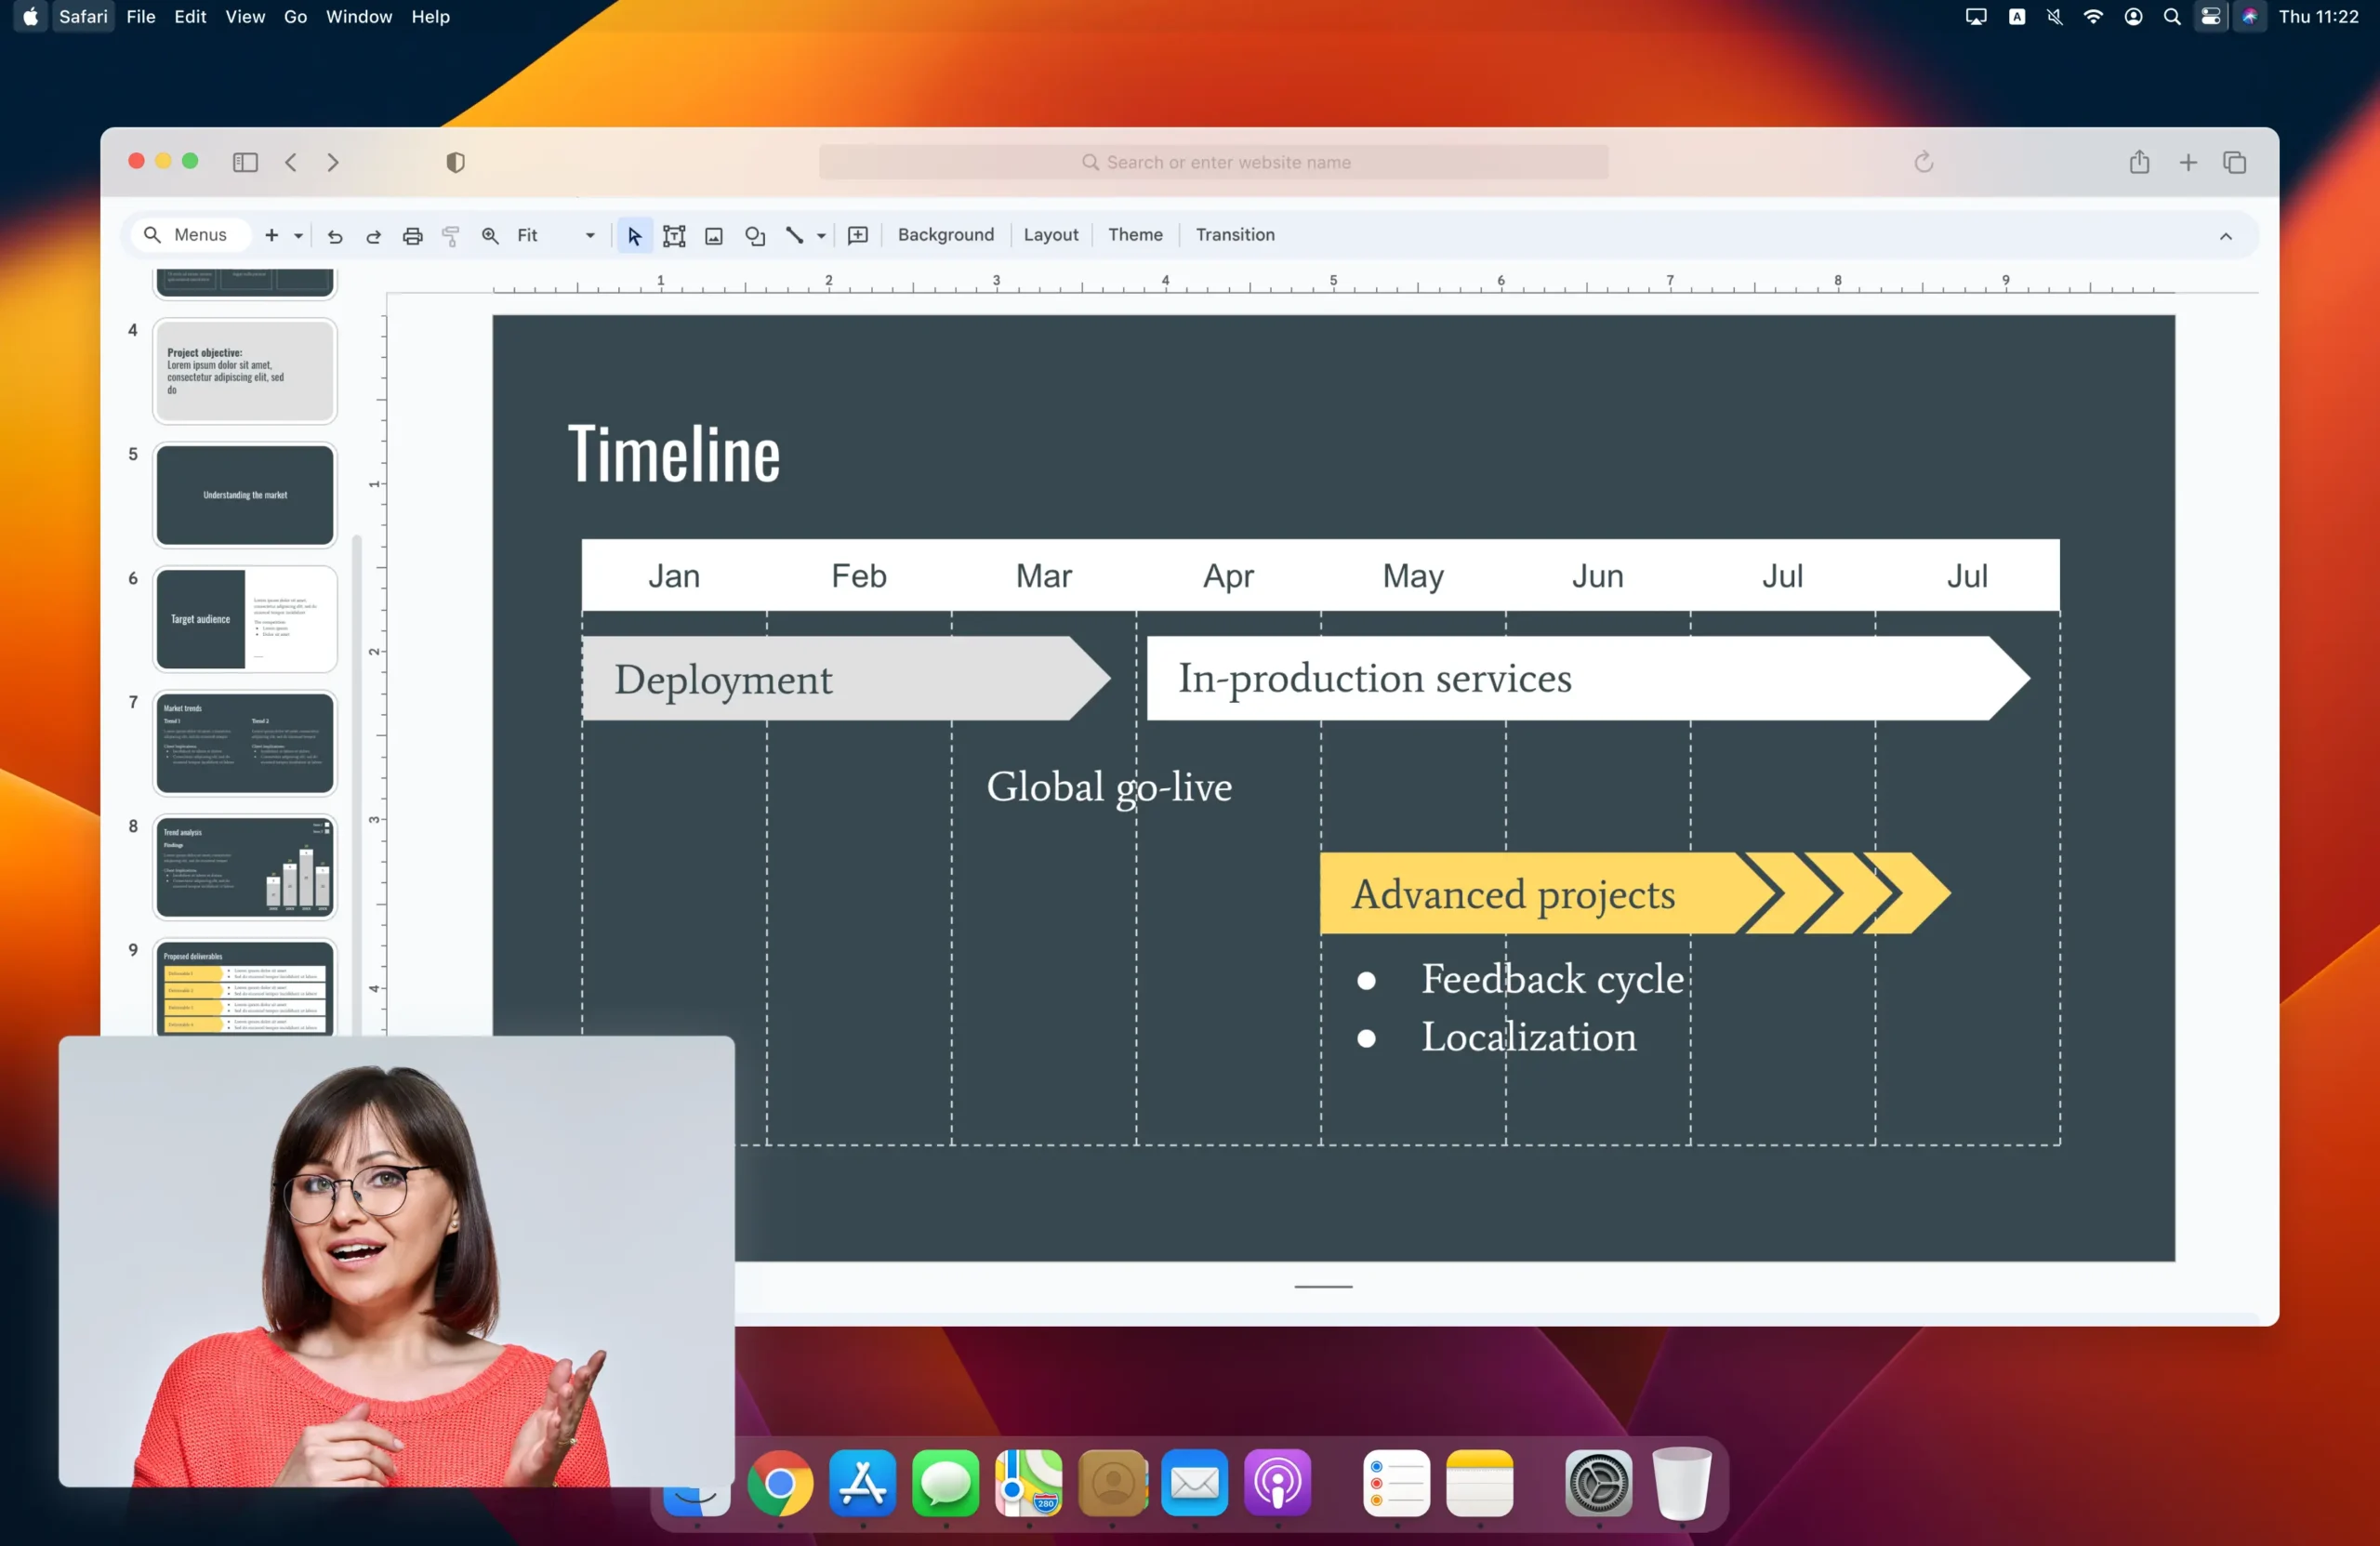
A small window will pop up for you, along with another small window with a button that says “Start Recording.” Press it, and the Screen Recorder will count down 3…2…1.
While recording your video, you can switch from camera to screen mode by pressing the full screen icon next to the “Start/Stop Recording” button. After recording, click the “Start/Stop Recording” button.
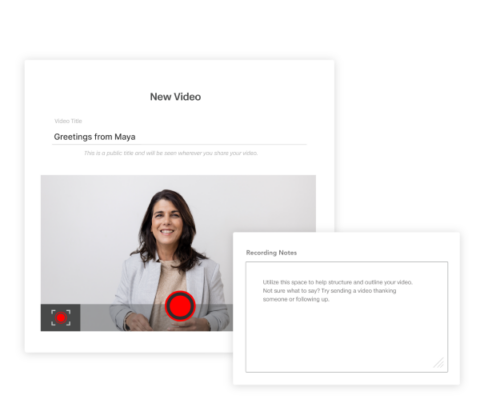
7. Finalize Your Video
When you click the “Stop” button, a new window will appear, saying, “Great recording!” Click the “Okay, thanks!” button, and a new window will show up, allowing you to put the finishing touches on your video.
Under “Video Title,” you can customize the video title to your liking. You can also choose your video thumbnail by clicking the “Thumbnail” button on the top left corner of your video.
Additionally, you can add a Call-to-Action by clicking “Add a Call to Action Banner” at the bottom of your video. This will help drive your recipients to take the next step you want them to take, like setting an appointment or signing a document.
Click that, and you can type in your custom CTA banner and link. Press “Save CTA,” and it’s all set.

Then, press the “Save” button at the top right of your screen, and your video will automatically be saved to your BombBomb video library.
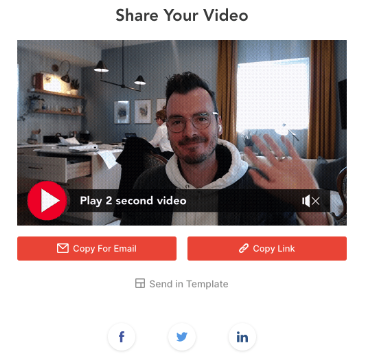
8. Send or Share Your Video
Once you save your video, a new window with your animated preview (GIF) and send and share options will appear. These options include: “Copy for Email,” “Copy Link,” and “Send with BombBomb Template.”
Here’s what those options do:
- Copy for Email: This option copies the HTML code of your video so that you can paste it into an email within a supported email service provider like Outlook or a Customer Relationship Management (CRM) tool.
A clear indicator that HTML is supported is if your email provider or CRM allows you to insert a graphic, like a logo or a photo.
- Copy Link: This button copies your video URL and pastes it into any web-based location, including LinkedIn, Facebook, Outlook, Slack, and more.
- Send with BombBomb Template: This option allows you to send your video with a branded template from your BombBomb account.
Once you press the button, a new tab will open in your browser, leading to the BombBomb Quick Send feature. You can add your custom video email template and send your video to all email lists there.
How Long Can You Screen Record?
BombBomb’s screen recorder allows you to create videos with no strict time limit, enabling you to capture detailed presentations, tutorials, and other lengthy content.
However, keeping recordings concise and focused for optimal viewer engagement and managing file sizes effectively is recommended.
Managing Recording Time:
- Aim for videos under 10 minutes when possible to maintain viewer attention.
- Plan and outline your content before recording to stay on track and avoid unnecessary length.
Dealing with File Size Limitations:
- Choose a resolution that balances quality and file size, such as 720p for most screen recordings.
- Break longer recordings into shorter, more manageable segments. This helps with file size and makes the content easier for viewers to digest.
How to Edit and Enhance Your Screen Recordings
Once you’ve recorded your video with BombBomb, the next step is to polish it using editing tools to make it more engaging and professional. Editing your screen recordings can help clarify your message, remove unnecessary parts, and add elements that capture the viewer’s attention.
Editing your screen recordings doesn’t have to be complicated. BombBomb’s user-friendly tools allow you to easily trim, cut, and merge video clips to create a harmonious final product.
Trimming Screen Recordings
Often, you might find that your recording has unnecessary parts at the beginning or end. Trimming allows you to remove these segments.
For example, if you spent the first few seconds setting up your screen or the last few seconds fumbling to stop the recording, you can trim these parts to ensure your video starts and ends cleanly.
Stitching Video Segments
Sometimes, you may have multiple video segments that need to be combined into one coherent video. Stitching allows you to merge these segments.
This is particularly useful if you record different parts of your content separately.
Here’s a simple process for editing with BombBomb:
- Access the Editing Tool: After recording, navigate to your BombBomb video library and select the video you want to edit.
- Trim Unnecessary Parts: Use the trimming tool to cut out the beginning and end segments that don’t add value to your video.
Stitch Video Segments: Combine multiple video clips if needed to create a single, cohesive video.
Bonus: Use the Screen Recorder Right Inside Your Gmail Inbox
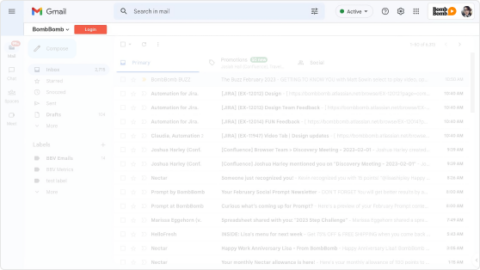
If you’ve downloaded the BombBomb Google Chrome Extension, you’ll also have access to the BombBomb PowerWheel within your Gmail Inbox. Discover more about the PowerWheel in this post.
The PowerWheel Allows you to record a video in an email you’re sending on Gmail. Click on the “Compose” button. Then, in the email you’re composing, click the red record button in your PowerWheel.
Press the “Screen Record” option on the bottom left corner of the next window to activate the screen recorder.
Then follow steps 5 and 6 above. Once your video is saved, your screen recording will be added to your email.
You can also press the “Record Screen” button below the “Compose” button in your Gmail inbox to launch the Screen Recorder. From there, you can record your screen recording, save it, set a thumbnail and CTA, and add it to an email.
How to Screen Record on Mac
Mac offers robust tools to make screen recording seamless and practical, whether creating a tutorial, presenting a project, or simply sharing what’s on your screen.
Does Mac Allow Screen Recording and Screen Capture?
Macs are well-equipped for screen recording and screen capture, offering users built-in functionalities that cater to various recording needs. MacOS Mojave and later versions come with a Screenshot Toolbar.
Using Mac’s Built-In Screen Recording Features
Thanks to the Screenshot Toolbar, initiating a screen capture on a Mac is straightforward. By pressing Command + Shift + 5, users can access a range of options, including capturing the entire screen, selected windows, or a custom portion of the screen.
You can choose to record the entire screen or a selected portion for video recordings, providing flexibility for various project needs.
Preparing Your MacBook for Video Recording
Before hitting the record button, ensuring your MacBook is set up correctly can significantly impact the quality of your video. Optimal settings include selecting the right microphone, adjusting the screen resolution, and closing unnecessary applications to ensure a smooth recording experience.
Also, consider your environment—minimizing background noise and ensuring adequate lighting can significantly enhance the video quality.
Where Does Screen Recording Go on Mac?
Screen recordings using the Screenshot Toolbar or QuickTime Player are saved to the desktop by default. This convenient location makes accessing and sharing your recordings straightforward.
However, for users who prefer a different storage location, macOS allows changing the default save location through the Screenshot Toolbar’s Options menu or manually saving the file to a desired location after recording in QuickTime Player. Organizing your screen recordings in a dedicated folder can help keep your projects organized and easily accessible.
Incorporating Webcam Footage for a Personal Touch
Adding a personal touch to your screen recordings by incorporating webcam footage can significantly enhance the viewer’s experience. It creates a more engaging and interactive video, allowing viewers to connect personally with the content.
This approach is particularly practical for tutorials, presentations, and remote communication, where facial expressions and body language can add depth to the message being conveyed.
Editing and Enhancing Your Mac Screen Recordings
Once you have captured your screen recording, the next step is to polish it for your audience. Basic editing includes trimming unnecessary parts, adding text overlays for clarity, or incorporating transitions for a smoother flow.
Optimizing Video and Audio Quality
High-quality video and audio are crucial for influential screen recordings. Ensure your screen resolution is high to capture clear visuals, and consider using an external microphone for superior audio quality.
Additionally, recording in a quiet space helps eliminate background noise, ensuring your message is heard loud and clear.
Engaging Your Audience
Keeping your audience engaged throughout your screen recording is essential. Use annotations to highlight important points, and consider breaking longer content into manageable sections to maintain viewer interest.
How to Screen Record on Windows
Windows OS is equipped with several built-in tools that offer screen recording capabilities. Before diving into third-party software, it’s essential to explore these native options, as they can sometimes provide the quick fix you need without additional cost or a learning curve.
Screen Recording Best Practices
Want to know the best practices to ensure your screen recording is successful? Here are our recommendations:
- Keep It Short and Simple: Ensure your screen recording lasts five minutes. This will make the information you share easier to digest, making your recipient more likely to retain everything you said.
- Be Prepared: Pull up all the sites and windows and have them ready to share before you launch the Screen Recorder. That way, you won’t waste time in your video trying to find what you need.
- Keep Your Video On: In the Screen Recorder, you can exit out of the window that shows your face while still recording your screen. Try not to do this, and keep your video on instead. You are providing value in this video. Let people associate that value with you!
- Be Aware of What Is On Your Screen: Make sure there isn’t any sensitive information on your screen before you start recording. As a rule of thumb, don’t use the Screen Recorder for any information that should not be in an email. Also, double-check that nothing on your screen could be offensive. Always ensure there isn’t anything on your screen you don’t want people to see. Be aware!
- Pause Notifications: Temporarily turn off any notifications (from Google Calendar, Slack, etc.) you have set up on your computer to eliminate the possibility of distractions in the middle of your screen recording. That way, your recipients will be focused solely on you.
Screen Recording for Different Use Cases
Whether you deliver a presentation, conduct a training session, or provide customer support, recording your screen and yourself can create a more engaging and effective experience.
Screen Recording for Business Presentations and Training
Screen recordings are invaluable tools for business professionals who want to create effective presentations and training materials.
They allow you to present information visually and engagingly, making it easier for colleagues and clients to understand and retain the material.
Recording yourself and your screen simultaneously creates a more engaging and personal experience for your audience.
They can see your facial expressions and body language, which helps build a connection.
For example, in a training session, participants can see your screen as you navigate the training materials and your face as you explain each step.
This ensures that participants can follow along with the visual content on your screen while hearing and seeing your explanations, making it easier to understand complex concepts.
Structuring Content:
- Plan your presentation by outlining key points. This helps keep your presentation focused and ensures you don’t miss any important information.
- Break down your presentation into smaller, manageable sections, making it easier for your audience to follow.
- Start each section with a brief overview to set the context and prepare your audience for the upcoming material.
Engaging Your Audience:
- Incorporate interactive elements such as polls, Q&A sessions, or calls to action to keep your audience engaged.
- Use your webcam to include a personal touch, allowing your audience to see your expressions and body language.
- Maintain a steady pace throughout your recording, avoiding rushing through the material, and take pauses to allow your audience to absorb the information.
Screen Recording for Marketing
Marketers can record anything from software walkthroughs to product demos and share them with their audience.
In today’s competitive market, screen recordings can stand out, offering a clear, concise, and interactive way to share information and grab viewers’ attention.
Enhancing Customer Experience with Screen Recording
Revolutionizing customer experience is crucial for marketers who want to make an impact. Screen recording is a versatile tool that can show how a product works and tell immersive stories.
It helps bridge the gap between businesses and consumers, offering interactive and personalized content that enhances the customer journey.
Personalized Product Demonstrations
Use screen recording to highlight your product’s features. Personalized demos cater to your customers’ interests, creating a stronger connection with your product.
BombBomb services allow you to send these demos directly to customers, offering a personalized approach that resonates and leads to conversions.
Real-Time Customer Support Tutorials
Screen recording can turn customer support from reactive to proactive. Step-by-step tutorials let customers solve problems at their own pace.
Integrating these with BombBomb’s video messaging adds a human touch that’s both effective and comforting in real-time.
Streamlining Content Creation with Screen Recorder
The world of content creation is always changing, pushing marketers to find more efficient ways to produce and share engaging content.
Screen recorders streamline this process, making it easier to develop content that captures your brand’s message. This tool enriches the content’s value and makes it more appealing.
Crafting Educational Webinars
Screen recording is great for making educational webinars. It lets presenters pre-record parts for smooth transitions and support live demos.
It’s key for creating visual aids that clarify complex topics, and with the right techniques, these recordings can be seamlessly added to live sessions, ensuring a professional and engaging learning experience.
Developing Engaging Video Content
To grab your audience’s attention, content needs to be informative and captivating. Screen recorders are crucial for making marketing videos that keep viewers interested from start to finish.
Combining storytelling with screen recording, marketers can create dynamic videos that inform and intrigue. BombBomb’s platform takes this further, letting you distribute these videos through email marketing, adding a personal touch to your digital campaigns.
Boosting Conversion Rates Through Screen Recording
Screen recording is transforming the marketing funnel by offering an authentic and direct way to showcase products and services.
This tool is an engaging strategy to nudge potential customers further down the conversion path. Through live demos and recorded testimonials, screen recordings can provide the persuasive push needed to turn leads into loyal customers.
Live Product Demos for Lead Nurturing
Using live product demos through screen recording is a powerful way to engage leads. It gives them a real-time, detailed look at what your product can do.
With BombBomb’s tools, marketers can send these demos right to their leads, track how they interact with them, and do targeted follow-ups. This improves lead nurturing and can lead to more sales.
Testimonials and Case Studies
There’s nothing more convincing than hearing from a happy customer. Screen recording lets you capture live testimonials and case studies in action, showing potential customers the real impact of your product.
When shared via BombBomb, these testimonials can be personalized and sent out effectively. This ensures that your message gets to the right people at the right time, increasing the chances of making a sale.
Analyzing Performance with Screen Recorder Insights
In the digital marketing era, understanding and optimizing user interaction is critical. Screen recorder insights provide a treasure trove of data that, when analyzed, can dramatically improve the performance and effectiveness of marketing campaigns. By scrutinizing how users interact with your content, marketers can make informed decisions that drive success.
Understanding User Interaction
Screen recordings of user sessions are invaluable for gaining a deep understanding of consumer behavior. Watching real interactions allows marketers to identify points of friction and opportunities for improvement.
BombBomb’s analytics tools complement these insights by tracking engagement and performance metrics, giving a comprehensive view of how users respond to your marketing efforts.
Optimizing Marketing Campaigns
With data harvested from screen recordings, marketing strategies can be refined and optimized. This data-driven approach allows marketers to adjust their campaigns in real-time, tailoring content to the preferences and behaviors of their audience.
Ensuring Compliance and Quality Control
Beyond marketing, screen recordings serve as an essential tool for internal training, quality assurance, and compliance. They provide a reliable means to maintain high standards in marketing execution and to document practices for regulatory purposes.
Training and Quality Assurance
Using screen recordings for staff training ensures that all team members understand the marketing tools and strategies at their disposal. These recordings can be used to demonstrate best practices, highlight exemplary work, or pinpoint areas for improvement.
Legal Compliance and Record-Keeping
In industries where marketing activities must be documented for compliance purposes, screen recordings offer a method of record-keeping that is both efficient and reliable.
BombBomb ensures the secure storage and management of these recordings, making it easier for companies to adhere to legal standards and protect themselves in the face of regulatory scrutiny.
Screen Recording for Customer Support
Customer support teams can use screen recordings to quickly and effectively resolve issues, providing customers with clear instructions and visual guidance. Recording yourself and your screen simultaneously can make these support videos more helpful and personal.

Recording yourself and your screen provides a more personalized support experience. Customers can see your face, making the interaction more human and engaging.
This approach is particularly effective for troubleshooting, where you can record step-by-step guides to help customers resolve problems independently.
It also works well for product demonstrations, where you can show how to use specific features or products, helping customers understand the functionality and benefits of your offerings.
Ways to Use the Screen Recorder in Your Business
Now that you know the ins and outs of the Screen Recorder, you’re probably wondering how you can use it in your business. You can use it too.
Present Information
Any time someone cannot schedule a time to meet with you, this is the perfect opportunity to present information with a screen recording instead.
This can be a quick overview of the sales deck you want to show salespeople. For teachers, it can be a walkthrough of the lesson plans, like the video below.
Sharing complex information with the Screen Recorder offers clarity and enhances retention for your recipients. Ultimately, helping them helps you.
Offer a Demonstration
Want to help people better understand something? The Screen Recorder allows you to demonstrate whatever you must convey to your recipients.
For customer support, this could be guiding customers through resolving any tech or customer service issues they may be experiencing. Or, if you’re a salesperson, you can screen-record a short product demo to show prospects how your product or service will work for them…
You can also create pre-recorded evergreen demonstration videos on your Screen Recorder that you can use repeatedly for multiple recipients. That way, you don’t have to repeatedly type or record the same message.
These videos also provide a better experience for your recipient because they can watch and absorb the information on their own time and refer back to it if they forget something.
Get More Attention
To get someone to play your video, you need to intrigue them. The Screen Recorder offers you great opportunities to stand out and get someone’s attention.
Good ways to do this include screen recording a person’s LinkedIn profile or website. Why does this work? They see and recognize it daily, eliciting the curiosity to click play.
It’s similar to when someone says your name in a crowded room. You’re drawn to it because it is your name. So, the key here is to showcase something familiar to your recipients.
For example, a real estate agent may screen-record their prospective client’s house on Google Earth. That’s because they know their prospect will be drawn to seeing their home on the screen. See how it was done in the video below.
Using the Screen Recorder to get attention differentiates you and personalizes the experience for your recipients. It offers surprise and gets them invested in what you have to say. This is how you’ll increase the chances of your videos being played.
Screen Recorder Extensions
A Google Chrome screen recorder extension provides a platform for you to record your screen right from your browser. It works inside of the tools you use every day. As a result, you’re able to present the information on your screen without switching screens or from tab to tab.
Using a screen recorder extension also…
- Establishes connection: Using the video feature in a screen recorder extension allows you to be face to face with your audience. This face-to-face connection helps build trust and foster meaningful relationships when you can’t meet in-person.
- Reaches your audience where they’re comfortable: Using video to record important information allows you to connect with people where they engage most. For example, some people may not reply to an email, but they may engage right away on a platform like Linkedin.
- Keeps things clear: Presenting information with a screen recorder extension makes it easier for your audience to understand what you need them to. This is because they can see what you’re explaining while listening to you present it.
9 Google Chrome Screen Recorder Extensions to Make Your Job Easier
So, which screen recorder extension is going to give you the features you’re looking for?
Keep reading for a list of nine Google Chrome screen recorder extensions that will help you save time, connect with your audience, and garner understanding with just one click…
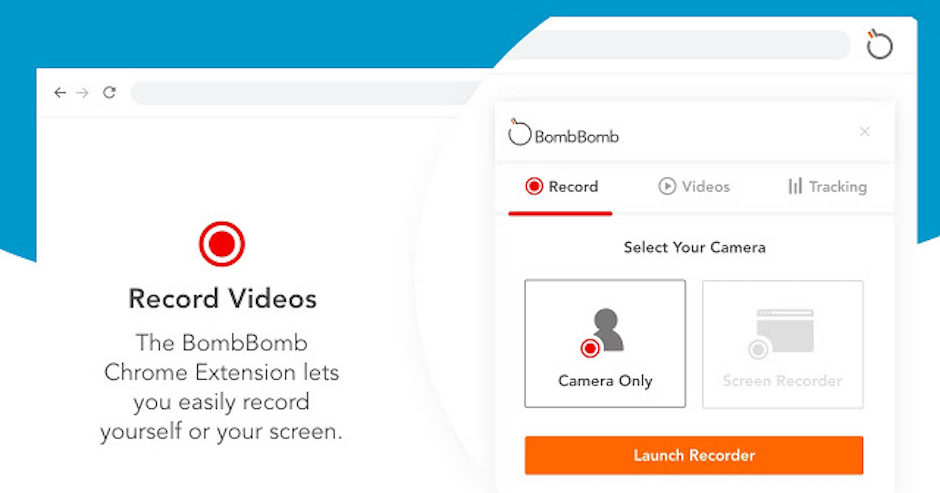
1. BombBomb Google Chrome Extension
Best For: Human-Centered Communication
Pricing: $33/month for BombBomb Essentials | $49/month for BombBomb Plus
Free Trial Available? Yes, free two-week trial
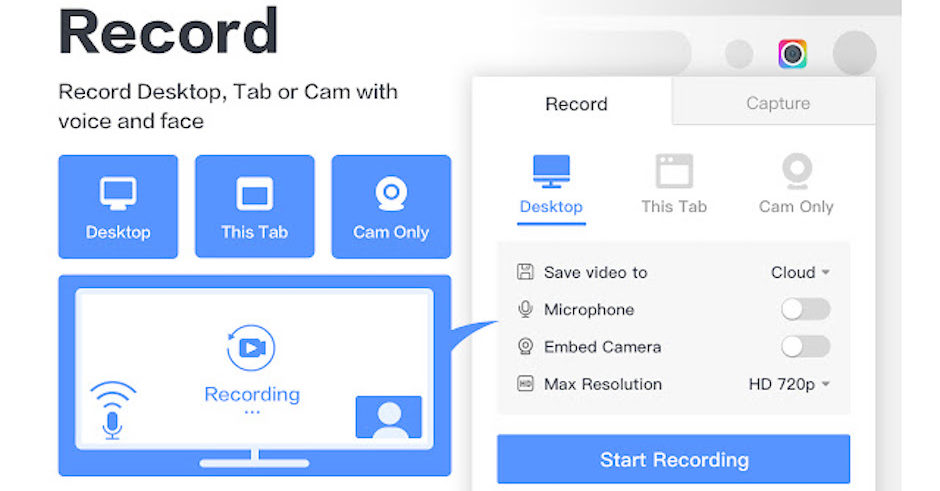
The BombBomb Google Chrome Extension has a screen recorder functionality that allows you to quickly record yourself and your screen at the same time. And, while it doesn’t offer editing capabilities or animation tools, this extension is a great solution for anyone looking to explain complex topics in a more human and personal way through video.
Using this extension will provide your recipients with clear communication because you’re face to face. It’s an excellent choice if you’re looking to eliminate a lot of back-and-forth communication or long, confusing plain-text emails.
Product Highlights
- Switch recording modes – Switch seamlessly between camera and screen recording.
- Animated preview – A unique three-second preview thumbnail or GIF will grab audience attention and let them know what to expect in your video — before they even press play.
- Call to Action – Need your recipients to do something? This screen recorder’s in-video Call to Action feature helps drive them to take the next step you’re asking them to take.
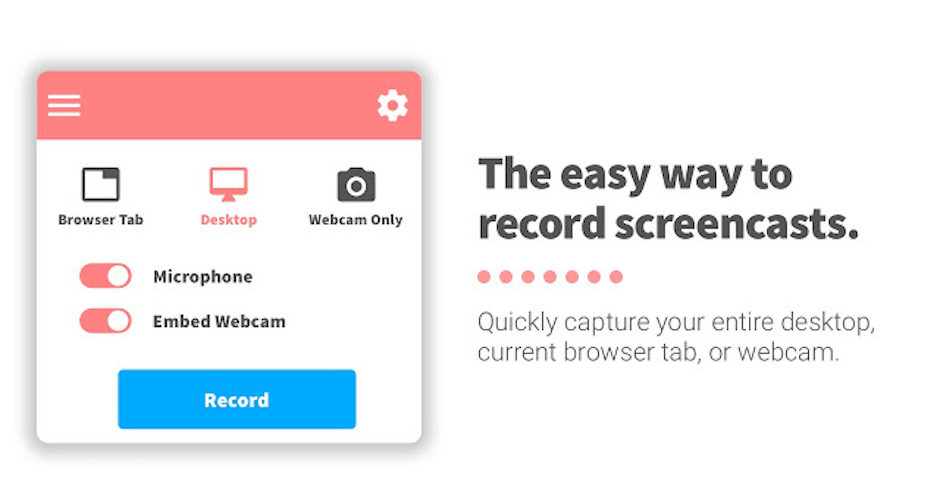
2. Screencastify
Best For: Everyday Content Creation
Pricing: Free for videos five minutes and under | Paid subscriptions starting at $49/year
Free Trial Available? No
Whether you’re a user experience designer or a student, Screencastify is for you. This screen recorder extension allows you to record yourself and your screen at the same time to create everyday content. And, while this specific application isn’t for elaborate video creation, it’s great for simple day-to-day demonstrations — such as brief product demos, school presentations, or YouTube videos.
Product Highlights
- Record offline – Record your screen, your face, or both, even when offline.
- Automatic uploading and publishing – Screencastify offers automatic Google Drive uploads and YouTube publishing capabilities to save and share your videos worldwide.
- Annotations – Use the pen tool to mark up or highlight specific sections of your recorded videos.
3. Awesome Screenshot
Best For: Project Management
Pricing: Free – screenshot capabilities only | $8/month for Awesome Screenshot Professional | $40/month for Awesome Screenshot Team
Free Trial Available? Yes, for premium features
Awesome Screenshot has an easy-to-use, two-tab option for users to switch between screen capture and screen recording. This makes Awesome Screenshot great for in-depth project descriptions when recipients may need copies of documents in addition to a detailed explanation.
If you’re looking to save screenshots quickly, it’s worth noting that users have to save each screenshot. (And, to do this, the extension takes you away from your screen recorder window.)
Product Highlights
- Recording option variety – Awesome Screenshot allows you to record your entire screen or specific application windows, as well as yourself or just your voice.
- Efficient login –Need to work quickly? Using your Google login takes less than two minutes from extension download to creating your first presentation.
- Multiple video dimensions – Awesome Screenshot allows users to choose video dimensions from 720p, 1080p, or 4K.
4. ShareX
Best For: Internal Communication and Problem Solving — especially in IT and Software Development departments
Pricing: Free
Free Trial Available? N/A
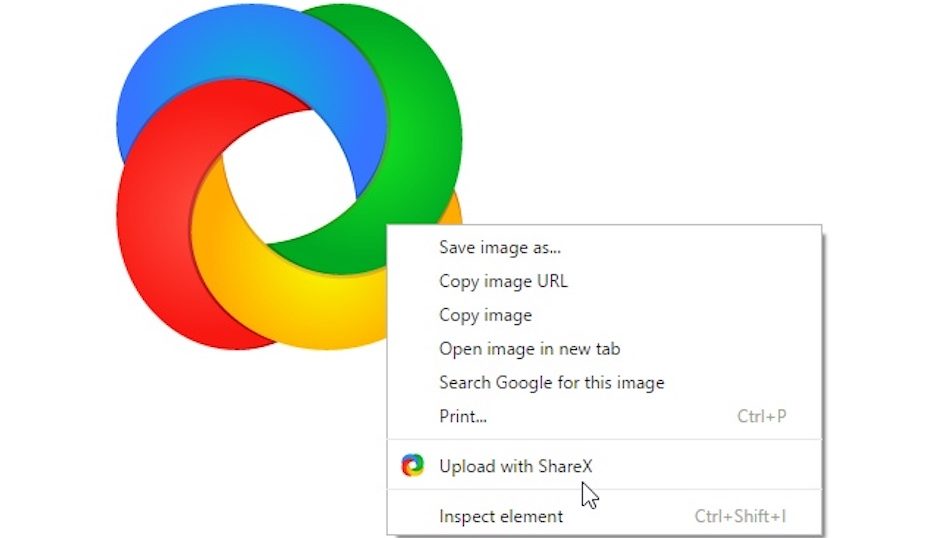
The ShareX Chrome extension is an excellent tool for recording internal videos within information technology and software development departments. This is because, with ShareX, users can capture or record even the smallest lines of code or data. (These features also make it great for troubleshooting software.) Its lack of an intuitive interface makes this extension more challenging to use, so being tech-savvy is a must.
Product Highlights
- Capturing capabilities – ShareX offers several capturing options such as full screen, scrolling, transparent region, and text capture.
- Editing tools – Multiple annotation and editing tools allow users to do anything from blurring sensitive information and cropping screenshots to highlighting important lines of data or code.
- Uploading – ShareX can upload videos and screenshots in 10 different ways. It also supports 80 image, text, file, and URL destinations.
5. Screen Recorder
Best For: Simple Recording
Pricing: Free
Free Trial Available? N/A
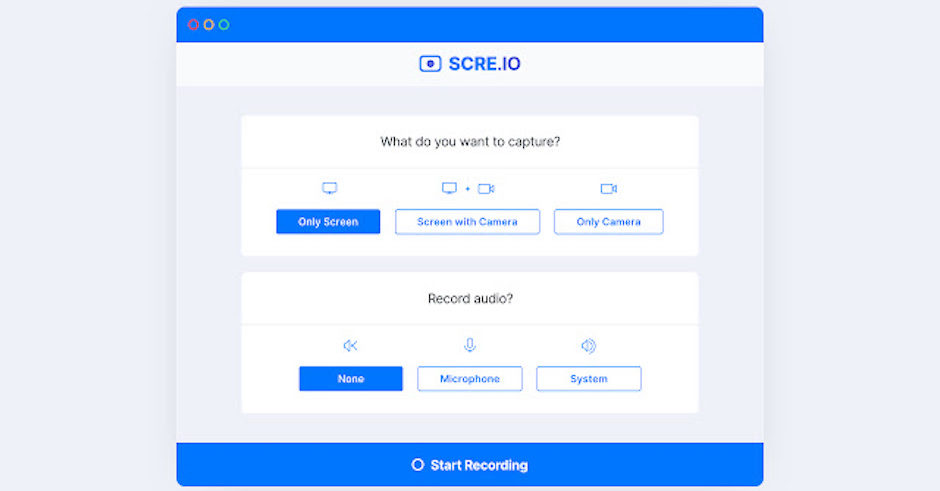
Some of the best products on the market do exactly as they say, and Screen Recorder is no different. What it lacks in sophistication, it makes up for in simplicity by ensuring even first-time video creators can successfully use this extension.
Product Highlights
- Easy-to-use recording – After downloading Screen Recorder, an application window with your recording options appears. From here, you select the options you want and press record. After you record your video, select “Save,” and Screen Recorder will save a link to your device. That’s it.
- Unlimited videos –There are no recording limitations. Users can record as much or as little as they need to.
- No sign-up required – To use Screen Recorder, all you need to do is download the Chrome Web Store extension to your computer.
6. Screencast-O-Matic
Best For: Seamless Presentations
Pricing: Free for videos 15 minutes or less | $48/year for Screencast-O-Matic Premier
Free Trial Available? No
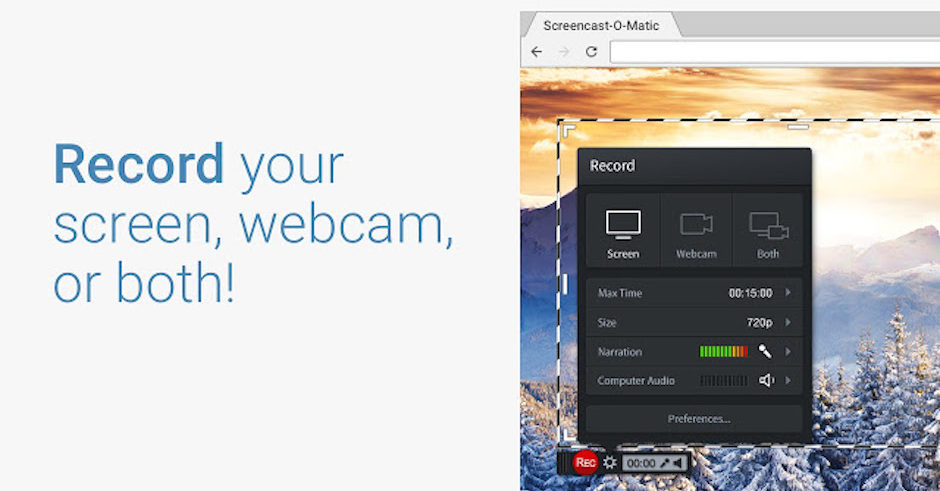
The Screencast-O-Matic screen recorder extension has three basic recording options and simple zoom and editing capabilities. It also has some of the Chrome Web Store’s best reviews for recording a Mac screen. (But, it’s worth mentioning that the pop-up advertisements can be distracting.)
Screencast-O-Matic has an easily adjustable recording frame. The adjustable frame makes this extension an excellent option to record Google Slides or Microsoft PowerPoint presentations because users can exclude unnecessary parts of their screen and focus on their slides.
Product Highlights
- Annotations – Use the drawing tools to mark up or highlight specific sections of your recorded videos or screenshots.
- Publishing – Publish and share screenshots and videos directly to your preferred cloud service.
- Zoom – The zoom tool allows users to zoom in on any section of their screen while recording.
7. Nimbus Capture

Best For: Teaching
Pricing: Free for basic recording features | $29.99/year for Nimbus Capture PRO | $39.99/year Nimbus Capture PRO+ Nimbus Note PRO
Free Trial Available? No
Using Nimbus Capture can be a little confusing initially. But, once you get the hang of it, using this extension is relatively easy.
The Nimbus screen recorder extension is Google Classroom ready. This feature makes it a great solution for educators to smoothly record and upload lessons and problem-solving videos for students.
Product Highlights
- Recording options – Capture your entire desktop, browser tabs, or use your webcam to record videos. Users can also capture or record screen fragments and any visible part of a page while scrolling.
- Certified for education – Nimbus Capture complies with the Family Education Rights and Privacy Act (FERPA) and the Children’s Online Privacy Protection Act (COPPA). It’s also California Student Privacy Certified (CSPC) through iKeepSafe as a leader in student privacy.
- Nimbus Note integration – After you’ve recorded a video, Nimbus makes it easy to add your videos to documents using the Nimbus Note program for an additional fee. This is optimal for more detailed lessons, presentations, and simplified note-taking.
8. ApowerREC
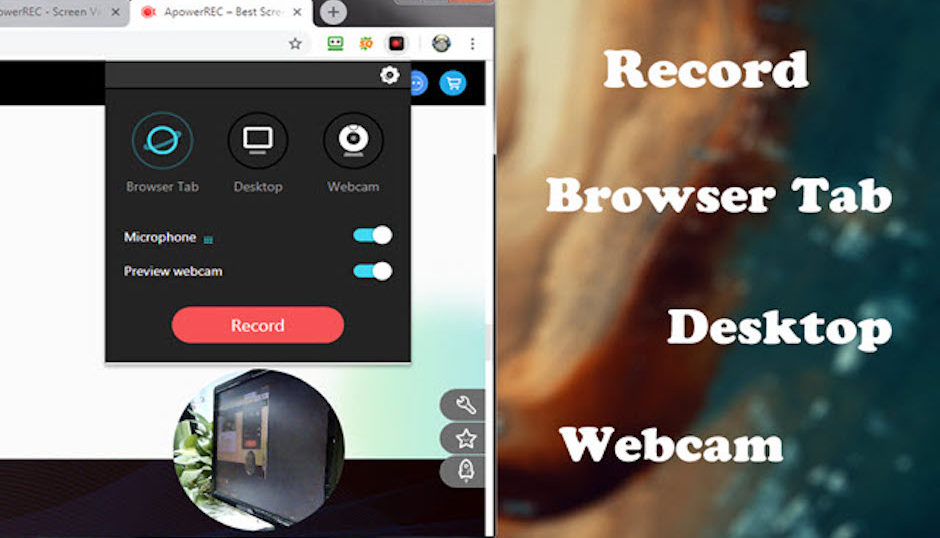
Best For: Event Recordings
Pricing: Free Screen Recorder Only | $59.95/year Apowersoft Unlimited
Free Trial Available? Yes
The ApowerREC screen recorder extension has the capability for users to record unlimited videos for any amount of time. As a result, it’s great for recording live-streamed events, webinars, or meetings. (But, some users do report the screen recorder moves a bit more slowly than they’d like.)
Product Highlights
- Intuitive interface – This feature makes it easy for anyone to record, upload, edit, and replay recordings.
- Converting – With ApowerREC, users can convert videos to formats like MP4, FLV, SWF, MPEG and upload them to FTP servers, YouTube, Dropbox, and Google Drive.
- Instantaneous saving – This screen recorder extension can auto-save videos and screenshots without user interference.
9. Powtoon Capture
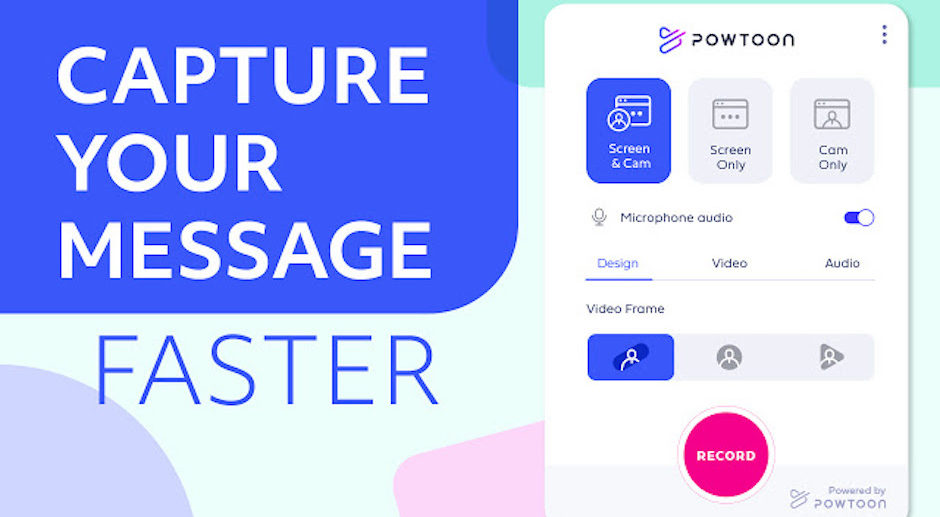
Best For: Learning and Development Training
Pricing: Free Screen Recorder Only | $89/month for Pro | $197/month for Pro+
Free Trial Available?: Yes, four-day premium feature trial
Recording a screen with Powtoon Capture is simple. And, once you begin recording, this extension allows users to pause and restart videos. This feature makes it ideal for more extended learning and development training sessions.
However, it can be challenging to locate your videos and screenshots in Powtoon after you’ve finished creating them. (Tip: You can find them in your Toolbox under the “Powtoons” tab on the upper right side of your screen.)
Product Highlights
- Video frame options – Looking to stand out? This extension offers three unique video frame options to visually grab viewer attention and add an animated feel to any video recording.
- Video sharing – Instantly share your video with an auto-generated link, on social platforms, or with email.
Want More Screen Recorder Training Tips?
This post has given you a crash course on the Screen Recorder, but if you want more training as you get started using it, we’ve got you covered!
Check out our webinar, “Screen Recorder Workshop: Best Practices + Examples,” led by BombBomb National Speaker Alicia Berruti and Client Enablement Manager Kevin Andrews.
They’ll provide even more tips, insights, and best practices for succeeding with the BombBomb Screen Recorder.